How to create a Customizable Paywall and deploy it in your app
Customizable Paywall is currently in Beta
Customizable is currently in beta, please use Glassfy SDK 1.4.0-beta
The Glassfy Customizable Paywall is a very powerful way to build and configure a paywall to meet your specific needs for maximum impact, with very little effort.
In this article you will learn :
- What is a Customizable Paywall
- How to Create a Customizable Paywall
- How to configure the Customizable Paywall in Glassfy Dashboard
- Display the paywall in your application
What is a Customizable Paywall
The Glassfy Customizable Paywall is built using commonly known technologies such as HTML, JS and CSS which enable a very powerful way to build and deploy paywalls.
Glassfy provides a JS file that has to be included in the paywall and that will allow the automatic management of the paywall element such as the button names connected with SKUs, standard messages and view management.
If you are familiar with HTML and JS you can build a paywall in minutes: let's see how!
How to create a Customizable Paywall
Create an HTML page and in the HEAD add the following code
<script
    src="https://cdn.jsdelivr.net/npm/[email protected]"
    integrity="sha384-CbmcbUFsFfqiXLWSOUmkOdz0fA1GXb7ZBjczpwjbRdcqNdi64nYzJYeFLdZxTND6"
    crossorigin="anonymous">
</script>
Add a close button at the top of the page by using the special HTML modifier data-gy-close
<button data-gy-close>CLOSE</button>
This will add a button that will close the paywall when tapped
Add a purchase SKU button by using the data-gy-purchase and the SKU reference gy.sku.1 (the first SKU in the list created in the dashboard).
<button data-gy-purchase="gy.sku.1">
  <span data-gy-var="gy.sku.3.description">
  </span>
  <span data-gy-var="gy.sku.3.price">
  </span>
  /
  <span data-gy-var="gy.sku.3.period">
  </span>
</button>
With the above code the button text is composed by the description, the original price / the original period for example
Premium Subscription $9.99 / month
You can use the following data attributes to display information in your paywall
| Data attribute | Use | Example |
|---|---|---|
| data-gy-link | Open a link and call a callback in the JS code | <a data-gy-link="https://example.com"> |
| data-gy-restore | create a restore purchase button | <button data-gy-restore>Restore</button> |
| data-gy-purchase | create a sku purchase button | <button data-gy-purchase="gy.sku.1"> |
| data-gy-var | display a variable (see table below for possible variables) | <span data-gy-var="gy.sku.3.description"> |
| data-gy-close | close button | <button data-gy-close>CLOSE</button> |
Here is a list of data variables that can be used with data-gy-var (N is the position in of the SKU as defined in the Dashboar)
| Variable | Description |
|---|---|
gy.msg.day | localised “day” message |
gy.msg.week | localised “week” message |
gy.msg.year | localised “year” message |
gy.sku.N.title | SKU title |
gy.sku.N.description | SKU description |
gy.sku.N.original_price | SKU original price not including promotion or intro |
gy.sku.N.original_duration | SKU original duration not including promotion or intro |
gy.sku.N.original_period | SKU original period not including promotion or intro |
gy.sku.N.original_daily | SKU original daily price not including promotion or intro |
gy.sku.N.original_weekly | SKU original weekly price not including promotion or intro |
gy.sku.N.original_monthly | SKU original monthly price not including promotion or intro |
gy.sku.N.original_yearly | SKU original yearly price not including promotion or intro |
gy.sku.N.intro_price | SKU intro price |
gy.sku.N.intro_duration | SKU intro duration |
gy.sku.N.intro_period | SKU intro period |
gy.sku.N.intro_daily | SKU intro daily price |
gy.sku.N.intro_weekly | SKU intro weekly price |
gy.sku.N.intro_yearly | SKU intro yearly price |
gy.sku.N.intro_discount | SKU intro discount price |
gy.sku.N.promo_price | SKU promo price |
gy.sku.N.promo_duration | SKU promo duration |
gy.sku.N.promo_period | SKU promo period |
gy.sku.N.promo_daily | SKU promo daily price |
gy.sku.N.promo_weekly | SKU promo weekly price |
gy.sku.N.promo_yearly | SKU promo yearly price |
gy.sku.N.promo_discount | SKY promo discount |
gy.sku.N.price | SKU price including the intro or promo |
gy.sku.N.duration | SKU duration including the intro or promo |
gy.sku.N.period | SKU period including the intro or promo |
gy.sku.N.discount | SKU discount vs the original price |
gy.sku.N.daily | SKU daily price including the intro or promo |
gy.sku.N.weekly | SKU weekly price including the intro or promo |
gy.sku.N.yearly | SKU yearly price including the intro or promo |
Insert all images as Base64 in the HTML file (you can use a service like Image to base64 converter) to create the image tags.
Now you can setup the paywall in the Glassfy Dashboard
How to configure the Customizable Paywall in Glassfy Dashboard
In the Dashboard go to Paywall settings and create a new Customizable paywall
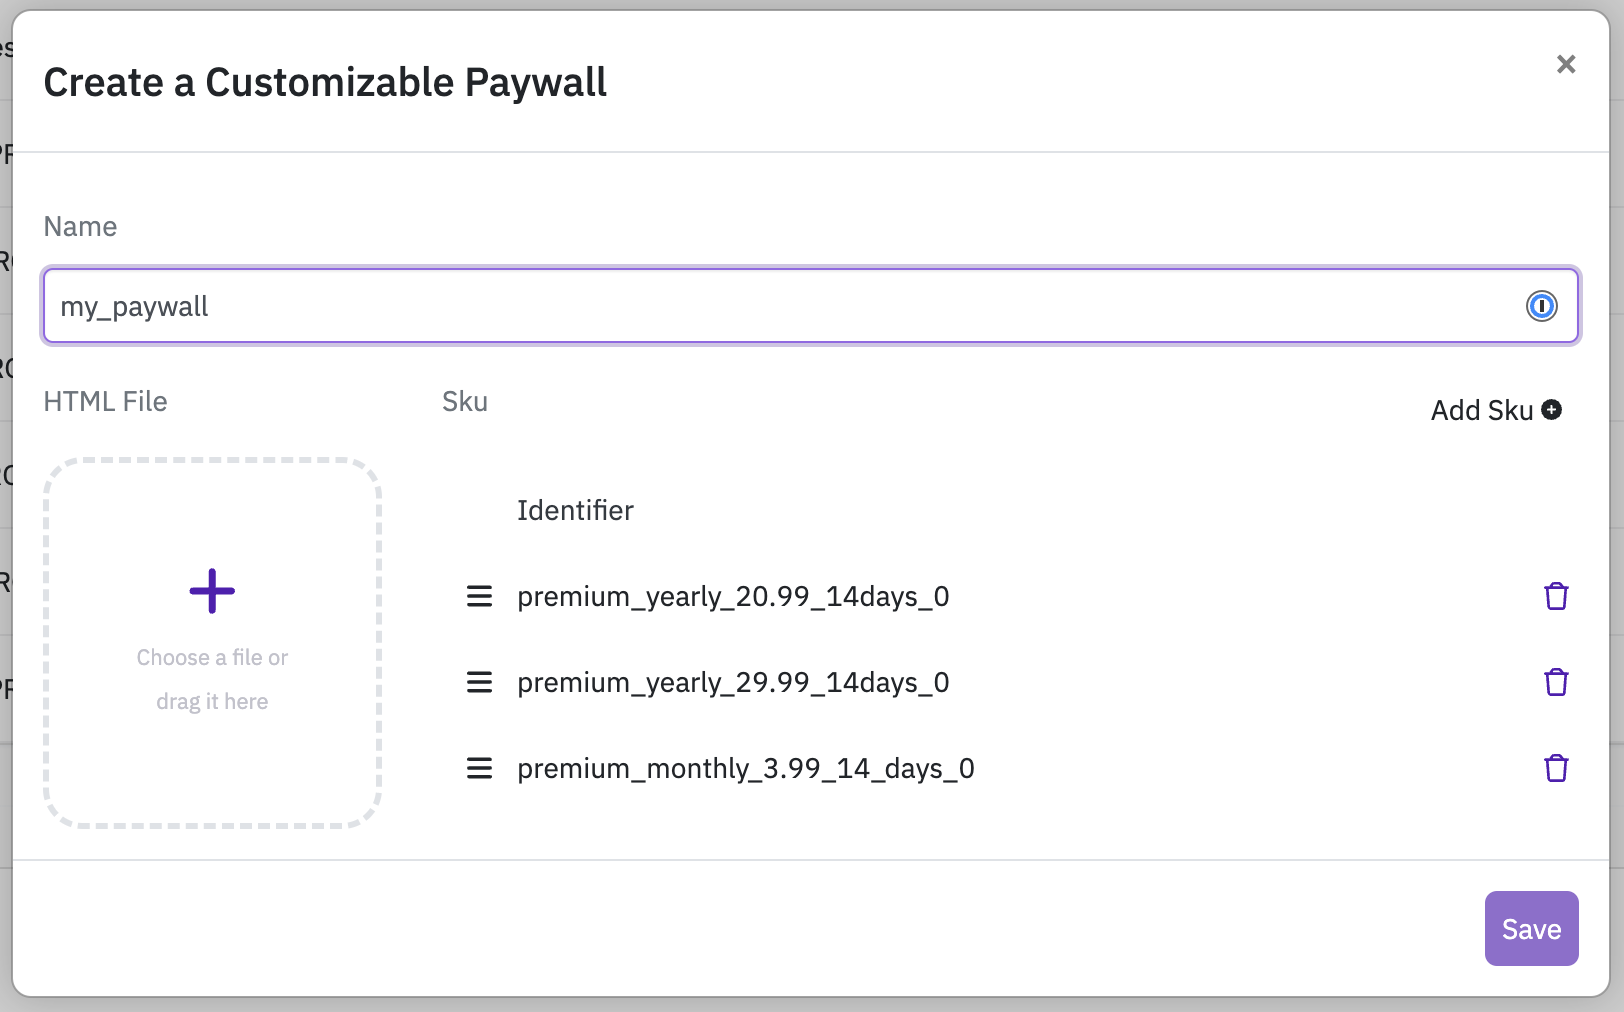
You need to drag the HTML file created at the previous step in the rectangle above and select the SKUs that will be used by the paywall. The SKUs will be referenced in the code by number with 1 being the highest in the list.
Now you can assign that paywall to a remote configuration that in this example we will call my_customizable_pw_config
Display the paywall in your application
In order to use customizable paywalls in your application you should use Glassfy iOS SDK 1.4.0-beta or later.
Glassfy.paywall(id: "my_customizable_pw_config") { [weak self] p, err in
    guard let p = p else {
        // handle error
        return;
    }
    self?.presentPaywall(viewController: p.paywallViewController)
}
// fragment already shown
if (supportFragmentManager.findFragmentByTag("paywall") != null) {
    return
}

Glassfy.paywall("my_customizable_pw_config") { result, error ->
    // check error
    [...]

    // activity must exists
    if (!supportFragmentManager.isDestroyed) {
        // show the fragment and attach a tag
        result?.paywallFragment?.show(supportFragmentManager, "paywall")
    }
}
Updated almost 2 years ago